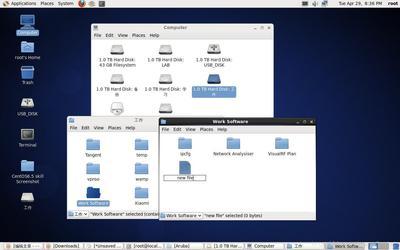
首先,需要说明到使我们如下操作均在CentOS系统里操作,并且拥有root权限。
第一步,安装ntfs-3g
第一种,可先尝试yum安装方式:
# yuminstall ntfs-3g
| Loaded plugins:fastestmirror, refresh-packagekit, security Loading mirror speeds from cached hostfile * base: mirror.esocc.com * extras: mirror.esocc.com * updates: mirror.esocc.com Setting up Install Process No package ntfs-3g available. Error: Nothing to do |
第二种,源码安装
如果不想配置安装源,那可以下载ntfs-3g源码来安装。
http://www.tuxera.com/community/ntfs-3g-download/
然后:
# tar zxvfntfs-3g_ntfsprogs-2013.1.13.tgz
# cd ntfs-3g_ntfsprogs-2013.1.13
# ./configure

如果出现如下信息,说明系统缺少编译器。
| checkingbuild system type... x86_64-unknown-linux-gnu checking host system type... x86_64-unknown-linux-gnu checking target system type... x86_64-unknown-linux-gnu checking for a BSD-compatible install... /usr/bin/install -c checking whether build environment is sane... yes checking for a thread-safe mkdir -p... /bin/mkdir -p checking for gawk... gawk checking whether make sets $(MAKE)... yes checking whether to enable maintainer-specific portions ofMakefiles... no checking for gcc... no checking for cc... no configure: error: no acceptable C compiler found in $PATH See `config.log' for more details. |
# yum -y install gcc
# yum -yinstall gcc-c++
如果gcc编译器已经安装完毕,或者configure 命令基本都是yes,并且最后出现信息:
| .... You can type now 'make' to build ntfs-3g. |
#make
# make install
第二步,挂载NTFS分区
第一种,命令方式手动挂载
首先,创建挂载点目录(可能也需要通过chmod设置访问权限):
# mkdir /mnt/Workspaces
在挂载之前,先确认挂载到分区信息:
# fdisk -l
| Disk /dev/sda:500.1 GB, 500107862016 bytes 255 heads, 63 sectors/track, 60801 cylinders Units = cylinders of 16065 * 512 = 8225280 bytes Sector size (logical/physical): 512 bytes / 4096 bytes I/O size (minimum/optimal): 4096 bytes / 4096 bytes Disk identifier: 0xbe4e78c8 DeviceBootStartEndBlocks IdSystem /dev/sda1*18159655371367 HPFS/NTFS Partition 1 does not start on physical sector boundary. /dev/sda2816018358819200007 HPFS/NTFS /dev/sda318358381181587200007 HPFS/NTFS /dev/sda43811860802182207488f W95 Ext'd (LBA) /dev/sda53811847042716800007 HPFS/NTFS /dev/sda6470425341651200000 83Linux /dev/sda753416545389011200 82Linux swap / Solaris |
然后,我们假设挂载sda3到Workspaces目录:
# mount -t ntfs-3g /dev/sda3 /mnt/Workspaces
执行完,如果没有任何信息输出,可查看该分区到文件信息了:
# ls /mnt/Workspaces
| projectsEclipses$RECYCLE.BINSystem VolumeInformation |
第二种,系统启动自动挂载。
修改/etc/fstab可用vi(本人习惯使用nano),然后在文件末尾添加新行。
# nano /etc/fstab
| # # /etc/fstab # Created by anaconda on Mon Oct 28 21:58:27 2013 # # Accessible filesystems, by reference, are maintained under'/dev/disk' # See man pages fstab(5), findfs(8), mount(8) and/or blkid(8) formore info # UUID=b8bfc164-ad1d-4f1a-863e-fcf80beaff8f/ext4defaults1 1 UUID=6db06959-4f44-47ac-9db4-99a91ec8bba5swapswapdefaults0 0 tmpfs/dev/shmtmpfsdefaults0 0 devpts/dev/ptsdevpts gid=5,mode=620 0 0 sysfs/syssysfsdefaults0 0 proc/procprocdefaults0 0 |
只读方式挂载:
| /dev/sda3/mnt/Workspaces ntfs-3g ro,umask=0222,defaults 00 |
读写模式挂载:
| /dev/sda3 /mnt/Workspaces ntfs-3g rw,umask=0000,defaults0 0 |
| /dev/sda3 /mnt/Workspaces ntfs-3g defaults 00 |
此处都是采用到分区设备编号来挂载,细心到朋友肯定也观察到系统的根/跟交换空间swap都是采用到UUID方式。当然我们也可以使用UUID方式挂载。参考:通过UUID在fstab中挂载分区
我们采用命令
#blkid
获得如下结果:
| /dev/sda6:UUID="b8bfc164-ad1d-4f1a-863e-fcf80beaff8f" TYPE="ext4" /dev/sda1: UUID="2E54A5DB54A5A5D5" TYPE="ntfs" /dev/sda2: LABEL="Softs" UUID="3282585182581BA3" TYPE="ntfs" /dev/sda3: LABEL="Workspaces" UUID="F8E01CAEE01C755A"TYPE="ntfs" /dev/sda5: LABEL="Backups" UUID="64788E4F788E2042"TYPE="ntfs" /dev/sda7: UUID="6db06959-4f44-47ac-9db4-99a91ec8bba5"TYPE="swap" |
| UUID=F8E01CAEE01C755A /mnt/Workspaces ntfs-3g defaults 00 |
最后,重启系统后,就可以直接访问/mnt/Workspaces目录来访问Win7的Label是Workspaces分区了。
最后祝君好运!
 爱华网
爱华网


