dosbox安装很简单.
apt-get install dosbox
生成配置文件
dosbox安装或自己make后并不会创建自己的配置文件,这里给出两种生成配置文件的方法。
第一种方法是
cd %切换到家目录
cp /usr/share/doc/dosbox/dosbox.conf.example.gz ./ gunzip dosbox.conf.example.gz
mv dosbox.conf.example dosbox.conf
第二种方法是启动dosbox,在dosbox的提示符下输入:
config -writeconf dosbox.conf
注意,dosbox启动时自动读取家目录下的dosbox.conf,而不是.dosbox.conf,改成其它的名字,dosbox也不会自动读取。
如果你想隐藏dosbox.conf,即将它更名为.dosbox.conf,可以在启动dosbox时输入下面的命令让它生效。
dosbox -conf ~/.dosbox.conf
配置声音设备
你用dosbox玩某个游戏,可能会看到下面的提示:
ALSA:Can't subscribe to MIDI port (65:0)
MIDI:Opened device:oss
这说明默认的设备是alsa,但是alsa不支持midi,于是打开了oss。其实这时游戏是可以正常发声的,只是这报错信息让人看着烦,通过修改dosbox.conf消除它。
打开dosbox.conf,找到[MIDI]一节。
mpu401=intelligent
device=default
config=
device=default就表示device=alsa,我们改为 device=oss,就没有那样的出错提示了。
游戏截图、屏幕录像
焦点在dosbox上时,使用ctrl + F5可以进行游戏截图(Alt+Ctrl+F5启/停屏幕录像),不过之前你要设置自己的截图保存目录。
默认的是配置文件所在目录下的capture目录,如果你没有这个目录,截图就会报错。
也可以通过修改配置文件更改成别的目录,打开配置文件,找到
captures=capture
这里我要把目录设置为配置文件所在目录下的dosbox-capture目录,把上面一行改为captures=dosbox-capture即可,注意这里要使用相对路径,给出截图目录的绝对路径也会报错。
除了ctrl+F5是截图外,ctrl加F1-F12都有功能,在dosbox的提示符下,输入intro就能看到这些组合键的功能。
组合键冲突解决
dosbox的组合功能键与LINUX的很多组合功能键冲突,可以用Ctrl+F1进入键盘按键设置,来设置功能键,避免和linux的功能键冲突。
DosBox设置文件.conf细读
这个设置文件一共有14部分。每个部分又分为前后两部分,前面是带“#”号的注释行,解释每个设置参数的意思,后面是参数设置行。
---------------------------------------------------
# This is the configurationfile for DOSBox 0.72.
# Lines starting with a # are commentlines.
# They are used to (briefly) document the effect of eachoption.
1. 输入输出设置
[sdl]
# fullscreen -- Start dosbox directly in fullscreen.这个参数是设置游戏窗口的。true就全屏,false就窗口.
# fulldouble -- Use double buffering in fullscreen.全屏的时候是否要双重缓冲,我试过,没看出什么不同。
# fullresolution -- What resolution to use for fullscreen: originalor fixed size (e.g. 1024x768). 设置全屏时的分辨率,如1024x768。
# windowresolution -- Scale the window to this size IF the outputdevice supports hardware scaling. 设置窗口比例,需要硬件支持。
# output -- What to use for output:surface,overlay,opengl,openglnb,ddraw.设置显示模式。有surface,overlay,opengl,openglnb,ddraw五种,我因为全屏显示有问题,所以挨个儿试过,但看不出变化来,好像柔和度稍微有点不同。
# autolock -- Mouse will automatically lock, if you click on thescreen. 鼠标自动锁定
# sensitiviy -- Mouse sensitivity. 鼠标灵敏度
# waitonerror -- Wait before closing the console if dosbox has anerror. DOSBOX运行中出错的处理,是否关闭
# priority -- Priority levels for dosbox:lowest,lower,normal,higher,highest,pause (when not focussed).程序优先级。有lower,normal,higher,highest4种。
# Second entry behind the comma is for when dosbox is notfocused/minimized.可以用逗号分开后面定义第二个优先级,即当窗口最小化或没有被选中时的优先级。(没想出来有什么用,难道用来挂外挂的?嗯,好像是有些游戏是养个小宠物在屏幕上的)
# mapperfile -- File used to load/save the key/event mappings from.自定义字符映射表。对于不满意游戏默认按键设置而游戏又不提供更改功能,想用某个键代替某个键时,考虑这个.
# usescancodes -- Avoid usage of symkeys, might not work on alloperating systems. 使用键盘按键扫描码,避免使用符号键,可能在所有的操作系统上都不工作。
fullscreen=false # 我把游戏设成窗口模式了。false。
fulldouble=false # 既然没有看出不同,就别双重缓冲了。false。
fullresolution=original#现在都是液晶屏了,分辨率一般都是固定的,不用改,直接和原机默认一样就好了original。
windowresolution=original#机器原先什么样,打游戏的时候就什么样,将来有问题再说。original
output=surface #改了半天没看出效果,直接用surface。
autolock=true#鼠标设成自动锁定了。反正有ctrl+F10可以变的。不过,有些游戏的正好有crtl+F10的功能设置(这个三国英杰传就是),那就比较麻烦。
sensitivity=100 #鼠标灵敏度设成100,是抄来的,感觉不好的时候可以调调这个数字,不过灵敏度高了肯定占资源。
waitonerror=true #如果程序出错就关闭dosbox窗口。true
priority=higher,normal #优先级随便定了。
mapperfile=mapper.txt # 这个map.txt文件在系统里没找到(Ctrl+F1设置完按键保存后,就在用户主目录下)
usescancodes=true #?
2.设置dosbox的一些常规项
[dosbox]
# language -- Select another language file.据说可以外挂语言包,现在当然只有英文,所以游戏目录一定要是英文的,不然dosbox不认。
# memsize -- Amount of memory DOSBox has in megabytes.给dosbox分配内存
# machine -- The type of machine tries toemulate:hercules,cga,tandy,pcjr,vga.显示模式,可选hercules,cga,tandy,vga。
# captures -- Directory where things like wave,midi,screenshot getcaptured. 据说dosbox可以截图录音的(默认截图用Ctrl+F5,启停屏幕录像用Ctrl+Alt+F5),所以这里应该是一个默认放截图录音文件的目录。
language= #语言包没有。
machine=vga #显示一般都是vga啦,其他的都是DOS时代很早期的垃圾显示卡
captures=capture #这个capture目录也不知道是在哪里,大家都这么写,我是抄来的。(我是这样写的/home/lv/video)
memsize=16 #这个16也是抄来的,不知道是个什么概念,我看到有人用很小的。(这是DOSBOX虚拟给DOS的内存大小,就相当于跑DOS的计算机装的是16M内存,其实DOS能用来运行程序的内存只有640K,640K以上的内存只用来存放数据,如果游戏够大,也可以设成32,再大也没什么意思了,除非跑win32)
3.设置图像
[render]
# frameskip -- How many frames DOSBox skips before drawing one.跳帧,为了加快游戏速度,这个我常用,一般我都设成1, 可调0-10.别跳太多,会晃眼的。也可以在游戏过程中自己调,ctrl+F8调改高,ctrl+F7调低。
# aspect -- Do aspect correction, if your output method doesn'tsupport scaling this can slow things down!.据说是象素高宽比,默认false是1:1。不调。如果输出模式不支持scale,不选false可能会让程序变慢。
# scaler -- Scaler used to enlarge/enhance low resolution modes.这是画面柔化用的。
# Supported arenone,normal2x,normal3x,advmame2x,advmame3x,hq2x,hq3x,
# 2xsai,super2xsai,supereagle,advinterp2x,advinterp3x,
# tv2x,tv3x,rgb2x,rgb3x,scan2x,scan3x.支持好多选项啊。none就是不柔化,后面那些都有些柔化。我调过,效果不是很明显。
# If forced is appended (like scaler=hq2x forced), the scaler willbe used
# even if the result might not be desired.还可以在选项后面加空格然后输入forced,强制,我看不出有如此强硬的必要,呵呵。
frameskip=1 #看,我把跳帧调成1了。
aspect=false # 当然是false,不然谁知道会发生什么?
scaler=advinterp2x #选择了一个大家都用的柔化尺度,"加强型双线性过滤"。
4.设置CPU
[cpu]
# core -- CPU Core used in emulation: normal,simple,dynamic,auto.dos模拟器CPU核心调整,有simple简易,normal通常,full完全,dynamic动态,auto自动,5个选项。
# auto switches from normal to dynamic if appropriate.设成自动时,在需要的时候会从通常变成动态。
# cycles -- Amount of instructions DOSBox tries to emulate eachmillisecond.
# Setting this value too high results in sound dropouts andlags.
# You can also let DOSBox guess the correct value by setting it tomax.
# The default setting (auto) switches to max if appropriate.模拟器CPU频率,默认3000。据说这个参数根据各人的机器不同各有最优值,调高调低都会让游戏变慢。我调过很高,20000多,没有变得更快,但也没觉得变慢了。不过这个参数效果很有限,它可不是变速齿轮。反正都设成了auto,需要的时候用户在任何时候都可以自己用ctrl+F12/F11调高调低。
# cycleup -- Amount of cycles to increase/decrease with keycombo.设置摁一次ctrl+F12调高的cycles数。
# cycledown Setting it lower than 100 will be a percentage.设置摁一次ctrl+F11调低的cycles数。
core=auto #看,设成auto了
cycles=auto #还是auto,主动权都交给用户了。
cycleup=500 #摁一次ctrl+F12调高500点
cycledown=20 #摁一次ctrl+F11调低20点(好像是微调的意思,谁那么灵敏啊?)
5.设置mixer
[mixer]
# nosound -- Enable silent mode, sound is still emulated though.静音,通常这个都设false。不喜欢音乐的话,自己到游戏里去关好了。
# rate -- Mixer sample rate, setting any devices higher than thiswill
# probably lower their sound quality.采样率。默认是22MHZ。都是小游戏midi音乐,没那么多讲究了。
# blocksize -- Mixer block size, larger blocks might help soundstuttering
# but sound will also be more lagged. 块体积:较大的块能改善声音停顿,但是会延迟.
# prebuffer -- How many milliseconds of data to keep on top of theblocksize. 缓冲。播放时缓冲多少毫秒,如果音乐卡卡的,就设大一点试试。缓冲越大系统资源占用越大。
nosound=false # 静音当然要false,否则怎么听音乐啊。
rate=22050 #设成了44100的一半,很妥协的感觉。
blocksize=2048 #抄来的数字2048,我不懂。
prebuffer=10 #还是抄来的。目前没法现声音太卡,或者偶然卡一下也无所谓,系统资源还是少占点为妙。
6.设置midi
[midi]
# mpu401 -- Type of MPU-401 to emulate: none, uart or intelligent.是否进行MPU-401模拟。听midi音乐自然是要模拟的。
# device -- Device that will receive the MIDI data fromMPU-401.
# This can be default,alsa,oss,win32,coreaudio,none.选择接受MPU-401发出的MIDI讯号的设备,默认就好了。
# config -- Special configuration options for the device. InWindows put
# the id of the device you want to use. See README for details.特殊的config,对某些各色的机器。很高深。
mpu401=intelligent #使用最高端设置。
device=default #默认的接收设备。
config= #不懂就不装懂了,让它空着吧。
7. 设置声霸卡
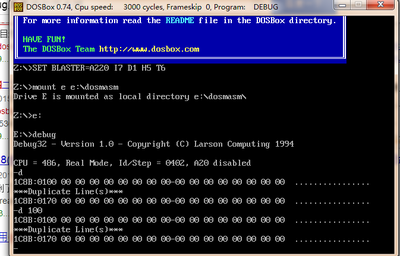
这部分我基本不懂,但知道对出声音很重要。配置的时候取了一个巧,找了个有“setup”文件的游戏,在windos系统里运行让游戏自己测(我也试过用wine在veket里运行,但没成功,怎么改变系统模式从95到xp都试了,都不行),例如魔兽1,或者英雄传说1,运行以后会跳出声霸卡设置界面,而且有建议设置(魔兽1最有意思,如果你改变建议设置,它会提醒你,说你设置的和你的机器硬件不符,我就乐翻了,既然都知道我的机器是什么配置,还让我乱选,这不是找事么?),好吧,就按照建议设置好,然后把设置值记下来,依样画葫芦写在这里,通常就行了。我用这个办法设置的conf文件,把网上所有人都说没声音的英雄传说1(dos版)的声效调出来了,很开心。
[sblaster]
# sbtype -- Type of sblaster toemulate:none,sb1,sb2,sbpro1,sbpro2,sb16.
# sbbase,irq,dma,hdma -- The IO/IRQ/DMA/High DMA address of thesoundblaster.
# mixer -- Allow the soundblaster mixer to modify the DOSBoxmixer.
# oplmode -- Type of OPL emulation:auto,cms,opl2,dualopl2,opl3.
# On auto the mode is determined by sblaster type.
# All OPL modes are 'Adlib', except for CMS.
# oplrate -- Sample rate of OPL music emulation.
sbtype=sb16
sbbase=220
irq=7
dma=1
hdma=5
mixer=true
oplmode=auto
oplrate=22050
8. 设置Gravis Ultrasound (据说用不上)
[gus]
# gus -- Enable the Gravis Ultrasound emulation.
# gusbase,irq1,irq2,dma1,dma2 -- The IO/IRQ/DMA addresses ofthe
# Gravis Ultrasound. (Same IRQ's and DMA's are OK.)
# gusrate -- Sample rate of Ultrasound emulation.
# ultradir -- Path to Ultrasound directory. In this directory
# there should be a MIDI directory that contains
# the patch files for GUS playback. Patch sets used
# with Timidity should work fine.
gus=true
gusrate=22050
gusbase=240
irq1=7 #据说要和上面声霸卡设置一样
irq2=5
dma1=1 #这项也要和上面一样。
dma2=3
ultradir=C:ULTRASND
9. 设置PC喇叭
[speaker]
# pcspeaker -- Enable PC-Speaker emulation. 是否用PC喇叭
# pcrate -- Sample rate of the PC-Speaker sound generation.设置喇叭抽样律
# tandy -- Enable Tandy Sound System emulation (off,on,auto).是否用Tandy sound sysem。
# For auto Tandysound emulation is present only if machine is setto tandy.
# tandyrate -- Sample rate of the Tandy 3-Voice generation.Tandysound的抽样率。
# disney -- Enable Disney Sound Source emulation. Covox VoiceMaster and Speech Thing compatible. 各种奇怪的声音系统设置。
pcspeaker=true #用PC喇叭,true。
pcrate=22050 #抽样率依旧
tandy=auto #就设自动好了,万一用得上呢?
tandyrate=22050
disney=true #也开着,不用也无所谓呀
10.设置操纵杆
[joystick]
# joysticktype -- Type of joystick to emulate: auto (default),none, 设置操纵杆类型
# 2axis (supports two joysticks,
# 4axis (supports one joystick, first joystick used),
# 4axis_2 (supports one joystick, second joystick used),
# fcs (Thrustmaster), ch (CH Flightstick).
# none disables joystick emulation.
# auto chooses emulation depending on real joystick(s).
# timed -- enable timed intervals for axis. (false is old stylebehaviour).
# autofire -- continuously fires as long as you keep the buttonpressed. 只要摁着键就连续射击
# swap34 -- swap the 3rd and the 4th axis. can be useful forcertain joysticks.
# buttonwrap -- enable button wrapping at the number of emulatedbuttons.

joysticktype=auto #自动是个好选项,一个auto就全搞定了。
timed=true
autofire=false#设成false了,有些游戏可能需要改成true,例如射击游戏。有人用操纵杆吗?我有时候用,不过在veket没试过,是否支持呢?
swap34=false
buttonwrap=true
11. 设置串口?
[serial]
# serial1-4 -- set type of device connected to com port.
# Can be disabled, dummy, modem, nullmodem, directserial.
# Additional parameters must be in the same line in the formof
# parameter:value. Parameter for all types is irq.
# for directserial: realport (required), rxdelay (optional).
# for modem: listenport (optional).
# for nullmodem: server, rxdelay, txdelay, telnet, usedtr,
# transparent, port, inhsocket (all optional).
# Example: serial1=modem listenport:5000
serial1=dummy
serial2=dummy
serial3=disabled
serial4=disabled
12.设置支持的内存类型
按理说全部支持就没错了,可也有例外的。
[dos]
# xms -- Enable XMS support.
# ems -- Enable EMS support.
# umb -- Enable UMB support.
# keyboardlayout -- Language code of the keyboard layout (ornone).
xms=true
ems=true
umb=true #有人说玩仙剑应该把这个关掉,我不懂。
keyboardlayout=none
13.
[ipx]
# ipx -- Enable ipx over UDP/IP emulation.
ipx=false
14.启动运行设置 ( 重要!)
[autoexec]
# Lines in this section will be run at startup. 下面的指令行在dosbox启动时会自动执行(相当于DOS下著名的autoexec.bat文件,下面是我的文件内容)
mount c ~/DOS
c:
path=path;c:;c:turboc2
dosbox配置文件详解(另一篇,作为参考)
[sdl]
# fullscreen -- Start dosbox directly in fullscreen.
#全屏启动dosbox
# autolock -- Mouse will automatically lock, if you click on the screen.
#如果你在屏幕上点一下,鼠标将会自动锁住
# sensitiviy -- Mouse sensitivity.
#鼠标敏感度
# waitonerror -- Wait before closing the console if dosbox has an error.
#如果dosbox错误,在关闭控制台之前等待
fullscreen=true
autolock=true
sensitivity=100
waitonerror=true
[dosbox]
# language -- Select another language file.
#选择另一种语言
# memsize -- Amount of memory dosbox has in megabytes.
#dosbox内存大小 百万字节(MB)为单位
language=
memsize=16
[render]
# frameskip -- How many frames dosbox skips before drawing one.
#在绘图前dosbox跳多少帧
# snapdir -- Directory where screenshots get saved.
#屏幕截图保存的目录
# scaler -- Scaler used to enlarge/enhance low resolution modes.
#扩大/提高低分辨率缩放模式
# Supported are none,normal2x,advmame2x
frameskip=0
snapdir=snaps
scaler=normal2x
[cpu]
# cycles -- Amount of instructions dosbox tries to emulate each millsecond.
#dosbox尝试每豪秒模拟的指令数量
# Setting this higher than your machine can handle is bad!
#设置此项高过于你的CPU处理能力是不行的
cycles=1800
[mixer]
#声音混合器
# nosound -- Enable silent mode, sound is still emulated though.
#启动静音模式,声音仍然在模拟!
# rate -- Mixer sample rate, setting any devices higher than this will
# probably lower their sound quality.
#混合器采样率,设置过高或许会降低声音的质量
# blocksize -- Mixer block size, larger blocks might help sound stuttering
# but sound will also be more lagged.
#混合器区块大小,较大的区块大小也许能解决声音停顿,但是也会更加滞后
# wavedir -- Directory where saved sound output goes when you use the
# sound record key-combination, check README file.
#当你使用组合键录音时录音保存的目录,请阅读README.txt文件
nosound=false
rate=22050
blocksize=2048
wavedir=waves
[midi]
# mpu401 -- Enable MPU-401 Emulation.
#开启MPU-401模拟
# device -- Device that will receive the MIDI data from MPU-401.
#所选装置将会从MPU-401接收MIDI数据
# This can be default,alsa,oss,win32,coreaudio,none.
#可以设置default,alsa,oss,win32,coreaudio,none几个值
# config -- Special configuration options for the device.
#装置特别配置选项
mpu401=true
device=default
config=
[sblaster]
# sblaster -- Enable the soundblaster emulation.
#开启soundblaster模拟
# base,irq,dma -- The IO/IRQ/DMA address of the soundblaster.
#soundblaster的IO/IRQ/DMA地址
# sbrate -- Sample rate of soundblaster emulation.
#soundblaster模拟采样率
# adlib -- Enable the adlib emulation.
#开启adlib模拟
# adlibrate -- Sample rate of adlib emulation.
#adlib模拟采样率
# cms -- Enable the Creative Music System/Gameblaster emulation.
#启动CMS/Gameblaster 模拟
# Enabling both the adlib and cms might give conflicts!
#同时开启adlib和cms有可能产生冲突!
# cmsrate -- Sample rate of cms emulation.
#CMS模拟采样率
sblaster=true
base=220
irq=7
dma=1
sbrate=22050
adlib=true
adlibrate=22050
cms=false
cmsrate=22050
[speaker]
#喇叭
# pcspeaker -- Enable PC-Speaker emulation.
#开启PC喇叭模拟
# pcrate -- Sample rate of the PC-Speaker sound generation.
#PC喇叭采样率
# tandy -- Enable Tandy 3-Voice emulation.
#开启Tandy公司的3-Voice模拟
# tandyrate -- Sample rate of the Tandy 3-Voice generation.
#Tandy公司3-Voice采样率
# disney -- Enable Disney Sound Source emulation.
#开启disney(狄斯耐)音源模拟
pcspeaker=true
pcrate=22050
tandy=true
tandyrate=22050
disney=true
[bios]
# Nothing to setup yet!
#无任何设置
[dos]
# xms -- Enable XMS support.启用XMS支持
# ems -- Enable EMS support.启用EMS支持
# dpmi -- Enable builtin DPMI host support.
#启用建立DPMI主机支持
# This might help in getting some games to work, but might crash others.
#这可能对一些游戏运行有利,但是其他一些游戏有可能导致PSP当机。
# So be sure to try both settings.
#试着设定TURE和FALSE来确定吧
xms=true
ems=true
dpmi=true
[modem]
# modem -- Enable virtual modem emulation.
#开启虚拟调制解调器模拟
# comport -- COM Port modem is connected to.
#modem连接的COM端口
# listenport -- TCP Port the momdem listens on for incoming connections.
#
modem=true
comport=2
listenport=23
[autoexec]
# Lines in this section will be run at startup.
#这一段将会在启动dosbox时运行(注:DOS游戏存放目录,可自由更改,比如mount c ms0:/psp/DosGame)
mount c ms0:/psp/DosGame